

|
|
|

|
COMM2003 repair .... |
| • Homepage » PEUGEOT MODELS (FAULTS AND SOLUTIONS) » 407 | |
| 08.05.2020 20:52 | # 1 |
 necmettinn necmettinn |
|
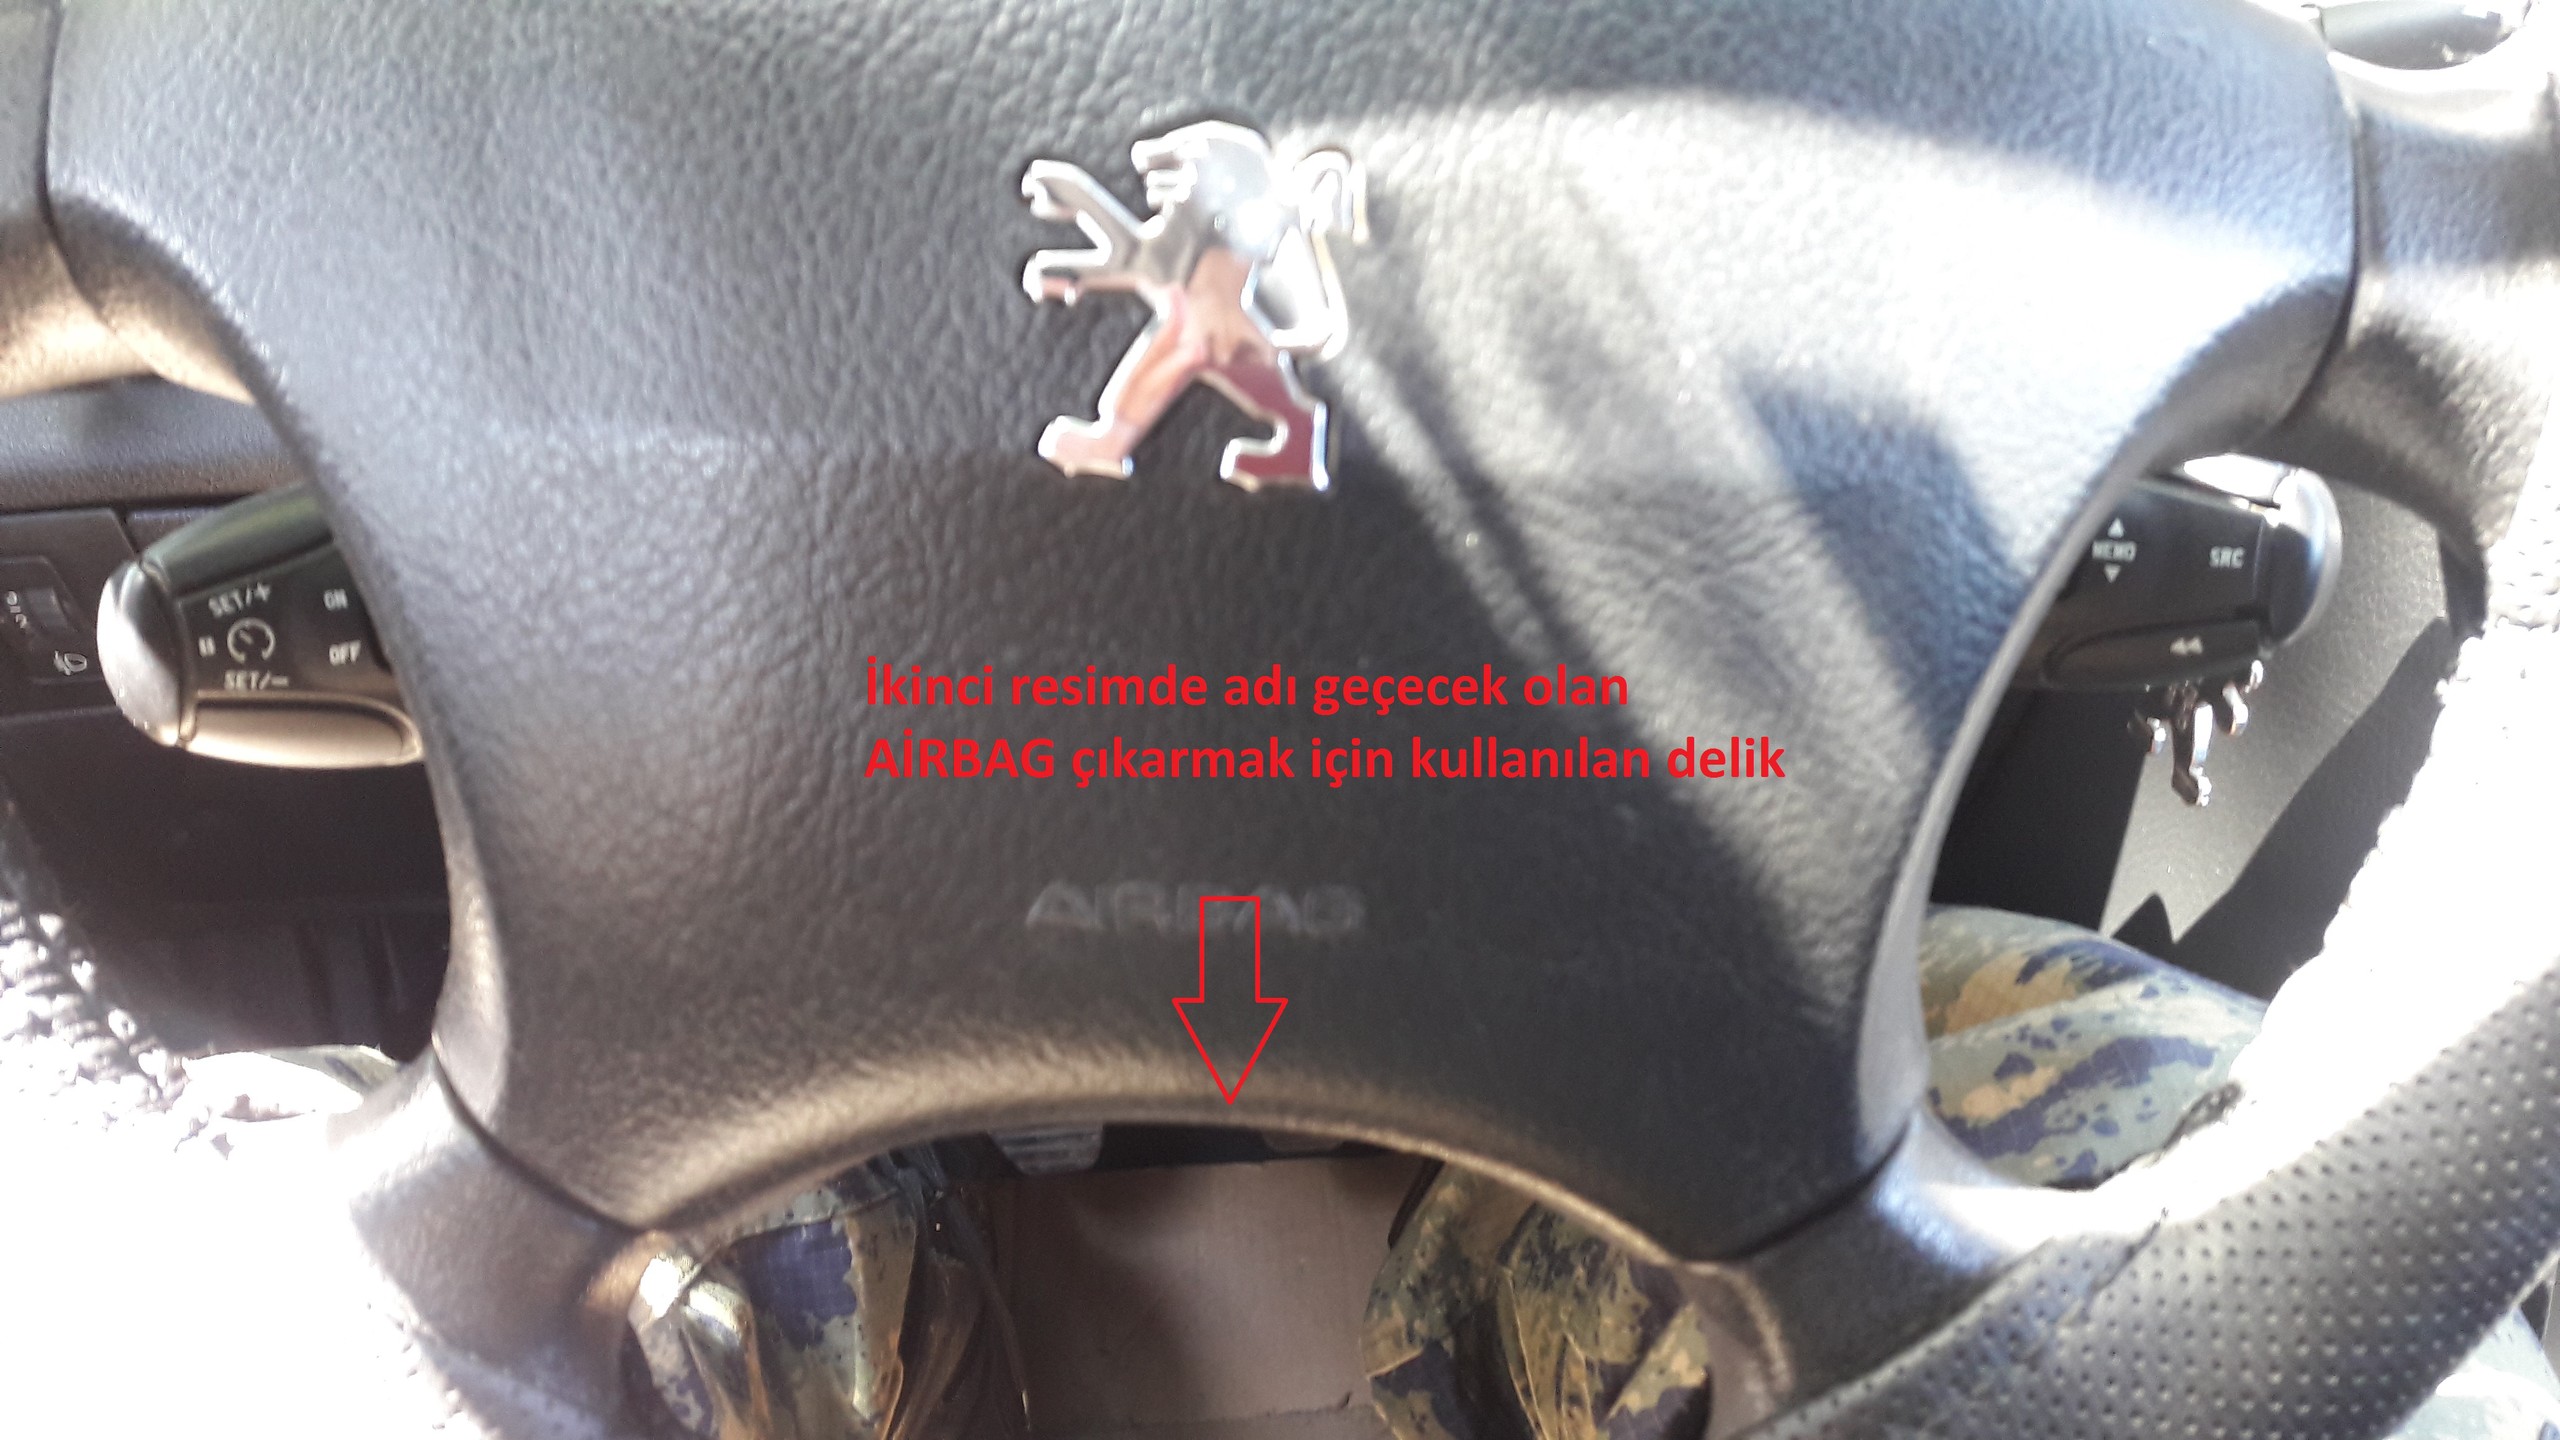  There are three sockets after the Airbag exits. two on the right and left of the Airbag, one on the bottom ... There are the locks shown in the picture above the right and left sockets, to remove the sockets, we have to pull the locks out and open them first. Then, it turns out when the sockets are pulled out, we need to be careful as these sockets are a bit sensitive. The bottom socket is a standard electrical connector socket, a socket with horn connection, much easier to remove. 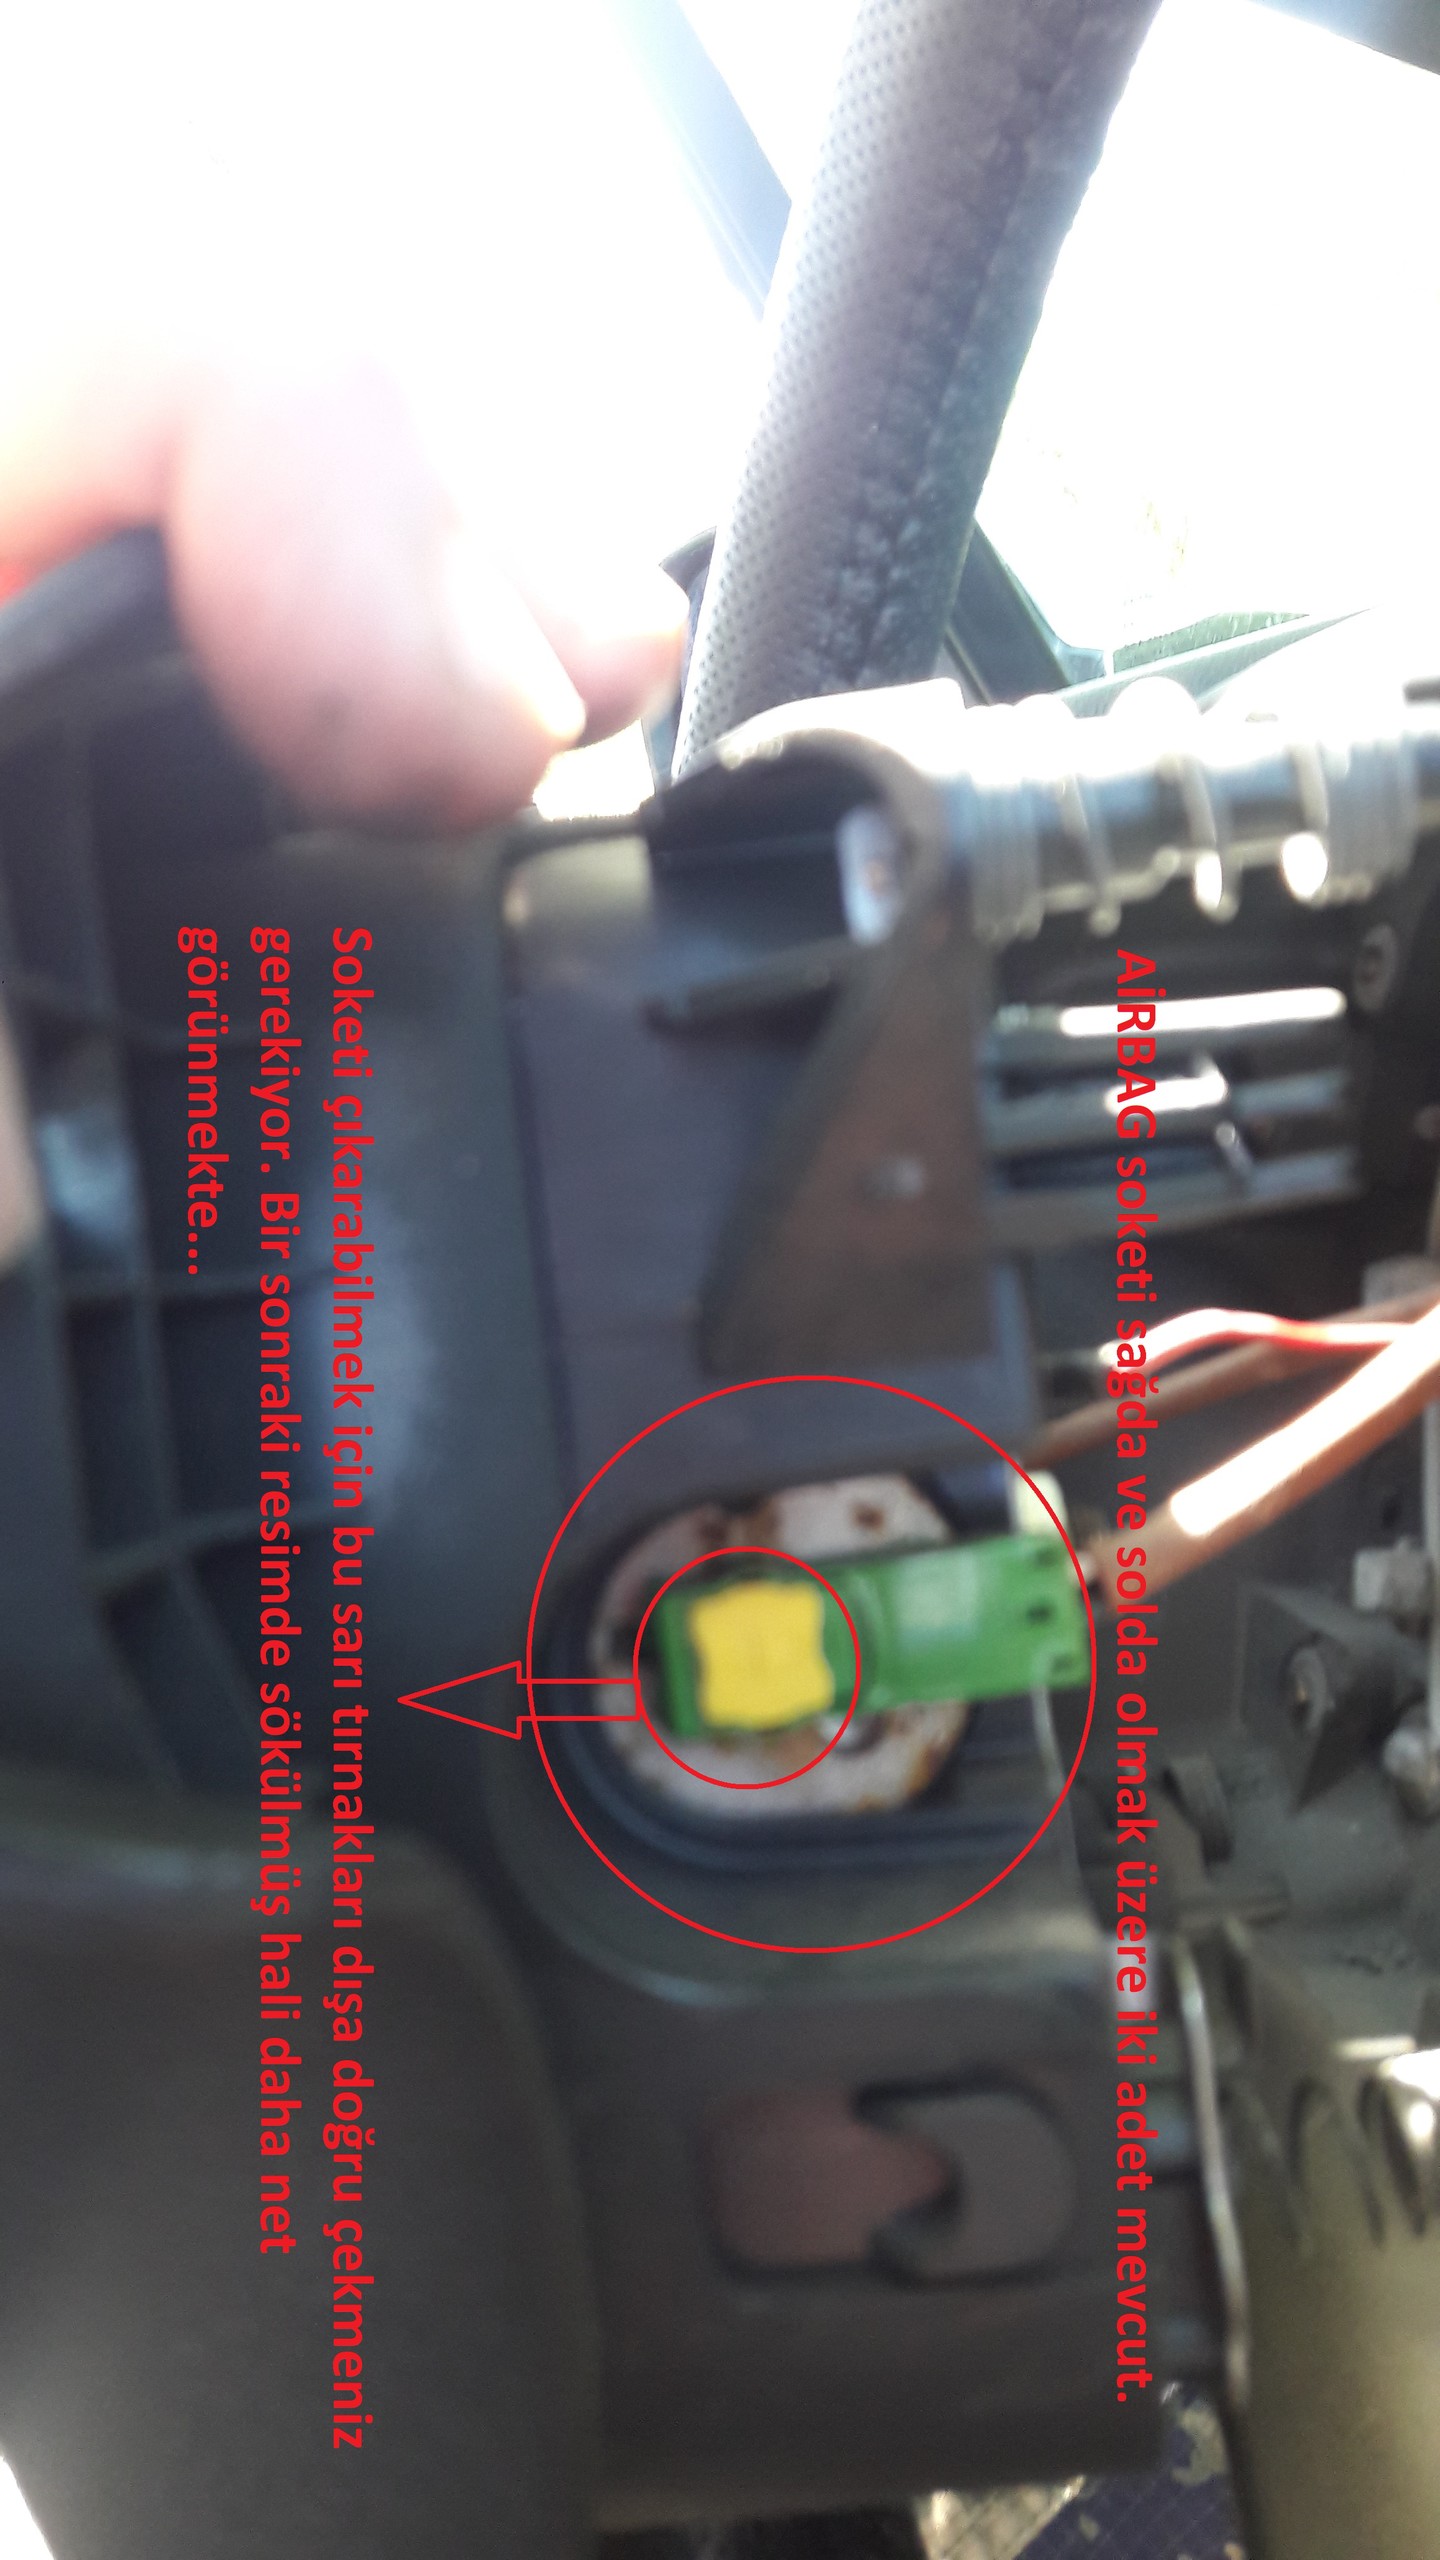 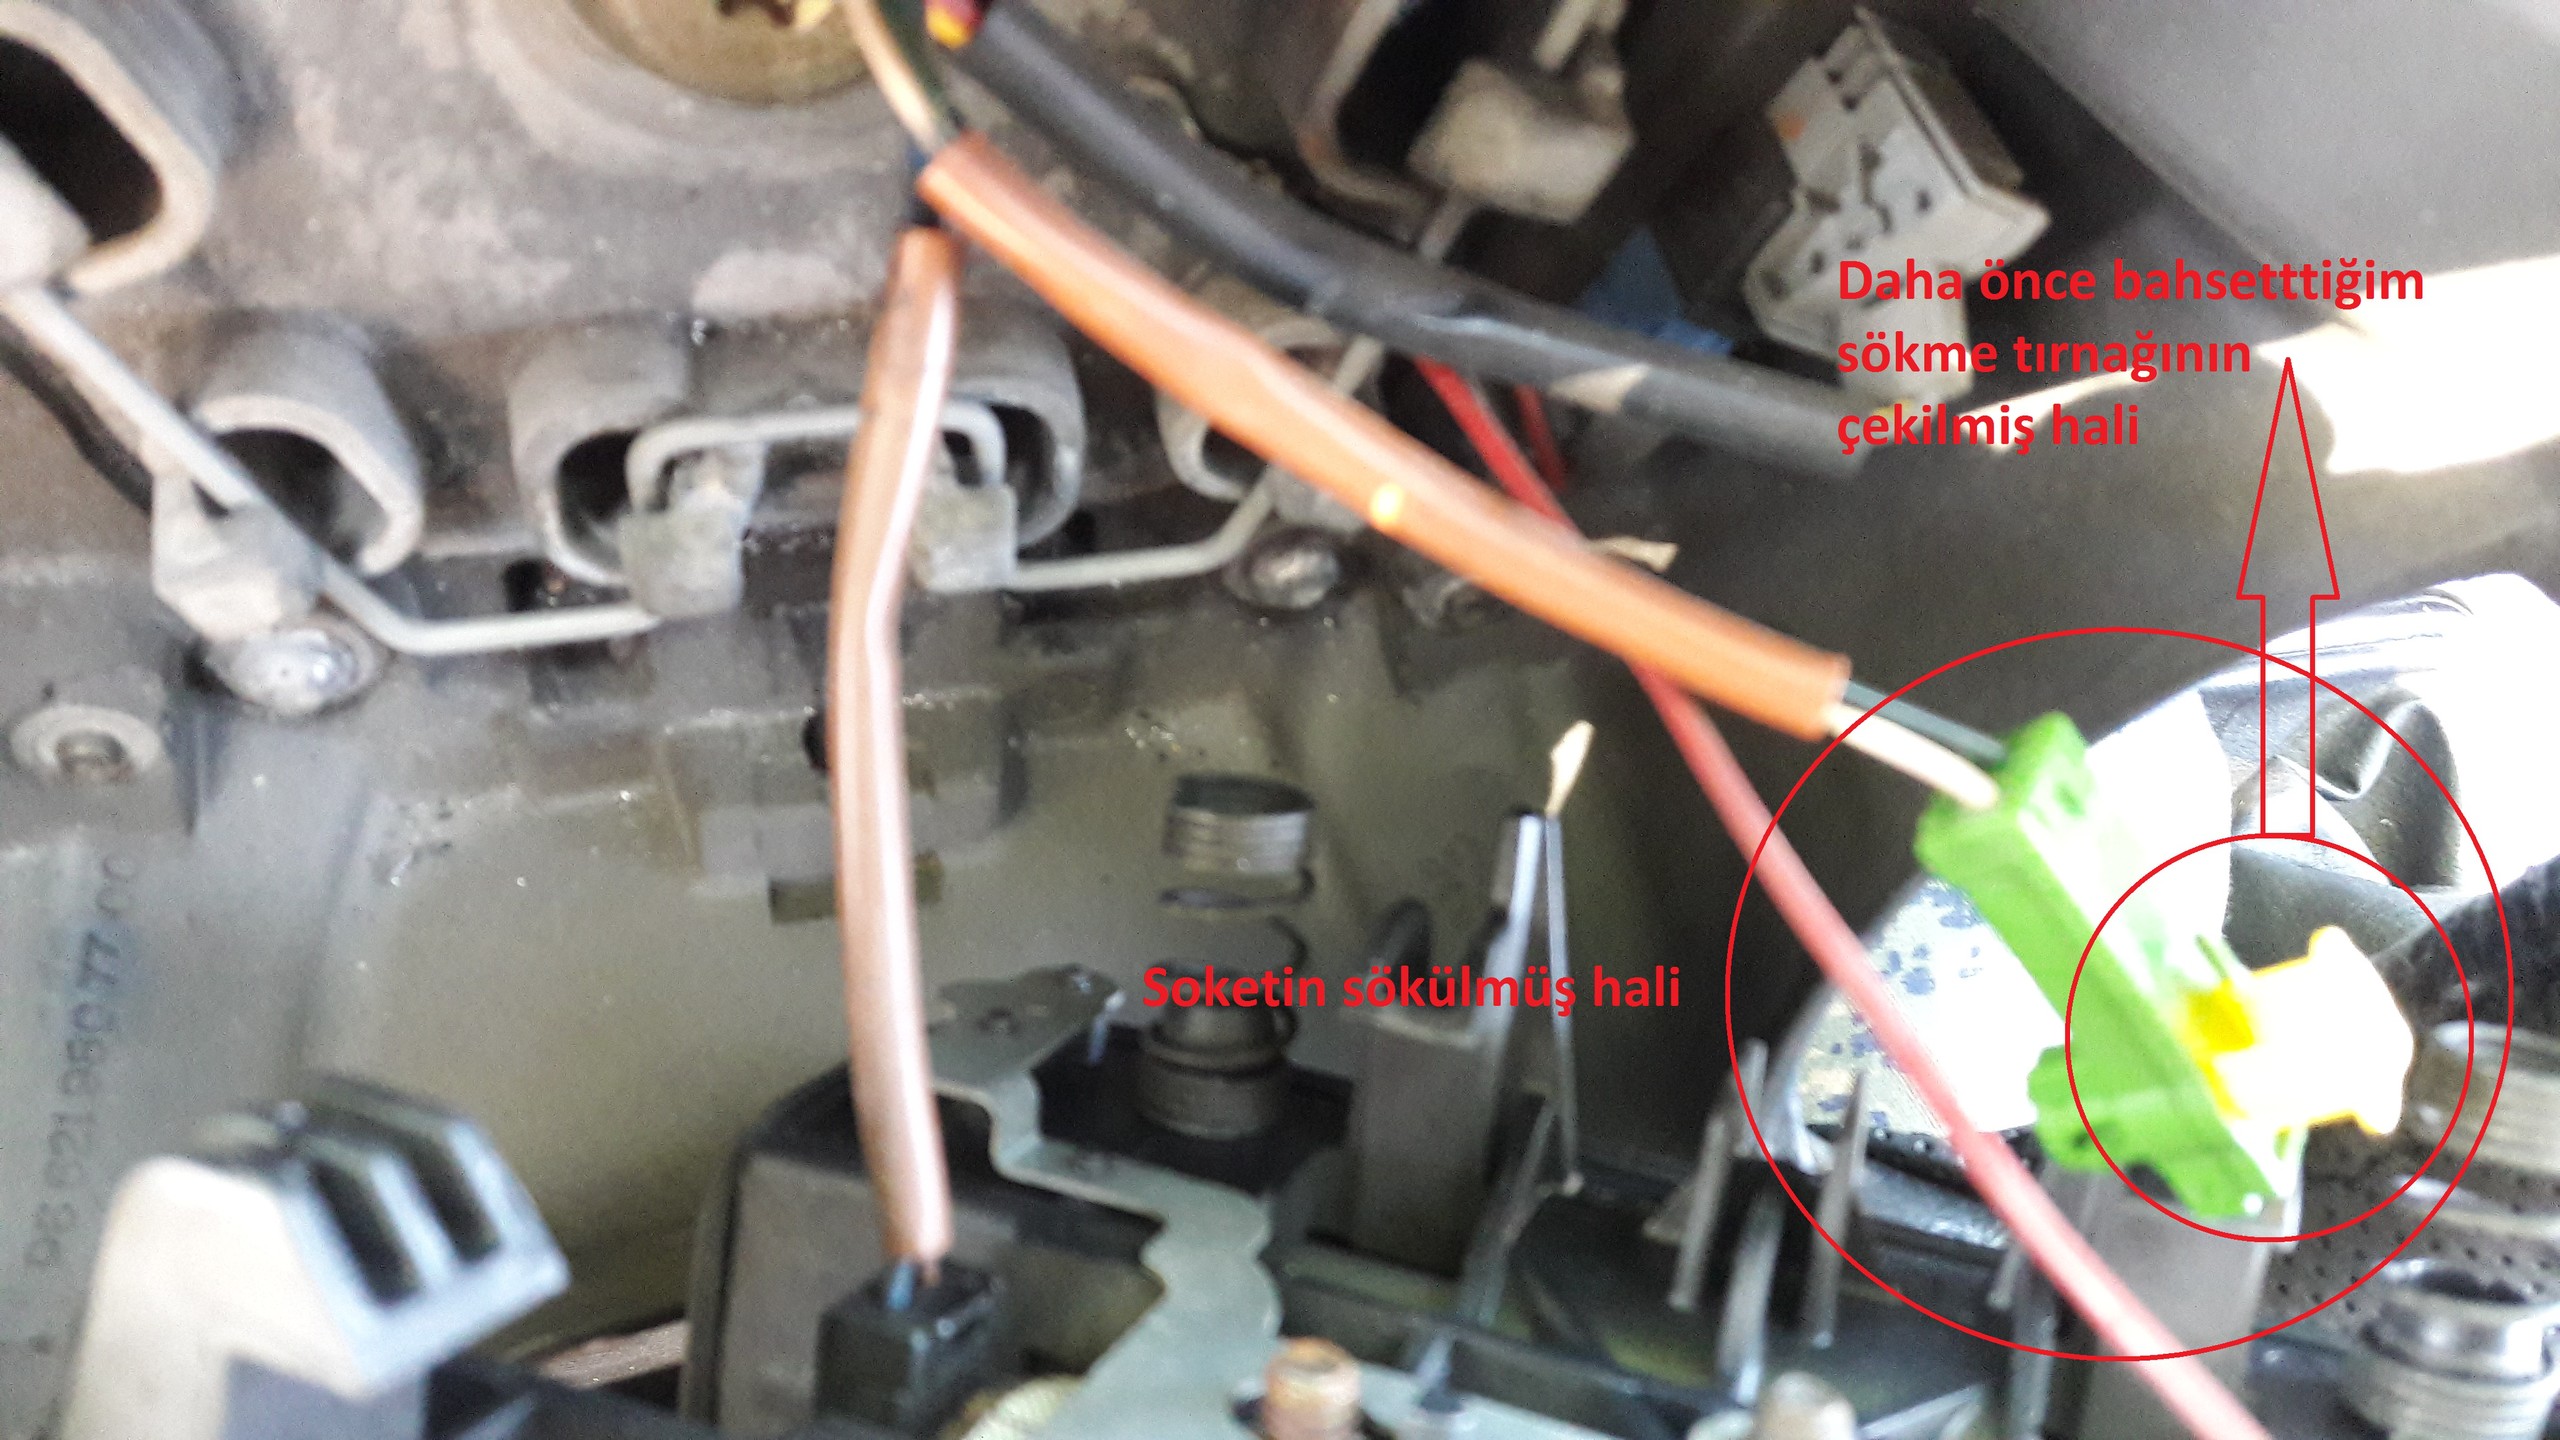  This image It is a bit complicated, I put the original version that I did not write on so that it is easier to examine ... The spring mechanism that we pushed to remove the first Airbag, the point we pushed is seen more clearly. The disassembled Airbag sockets are here. I highlighted the four points in the corners that those who have problems with their horn should look in green color. Likewise, there is a metal part under the Airbag, its four corners are working by pressing the points here. A little lifting of the corners of the metal part under the airbag will again solve the horn problem. After removing the airbag, we need to remove the steering wheel. For this, the point that we have to be careful about is that the steering wheel is in the straight position, prevents us from making mistakes while installing it and prevents a possible wrong driving position. At the center of the steering wheel is a T45 six-legged star screw. We loosen this a little bit first, we do not remove it completely. After loosening two turns, the steering wheel gets rid of the teeth when it hits the steering wheel a little from below. Then we remove the screw completely and the steering wheel can also be easily removed ...  original image ... 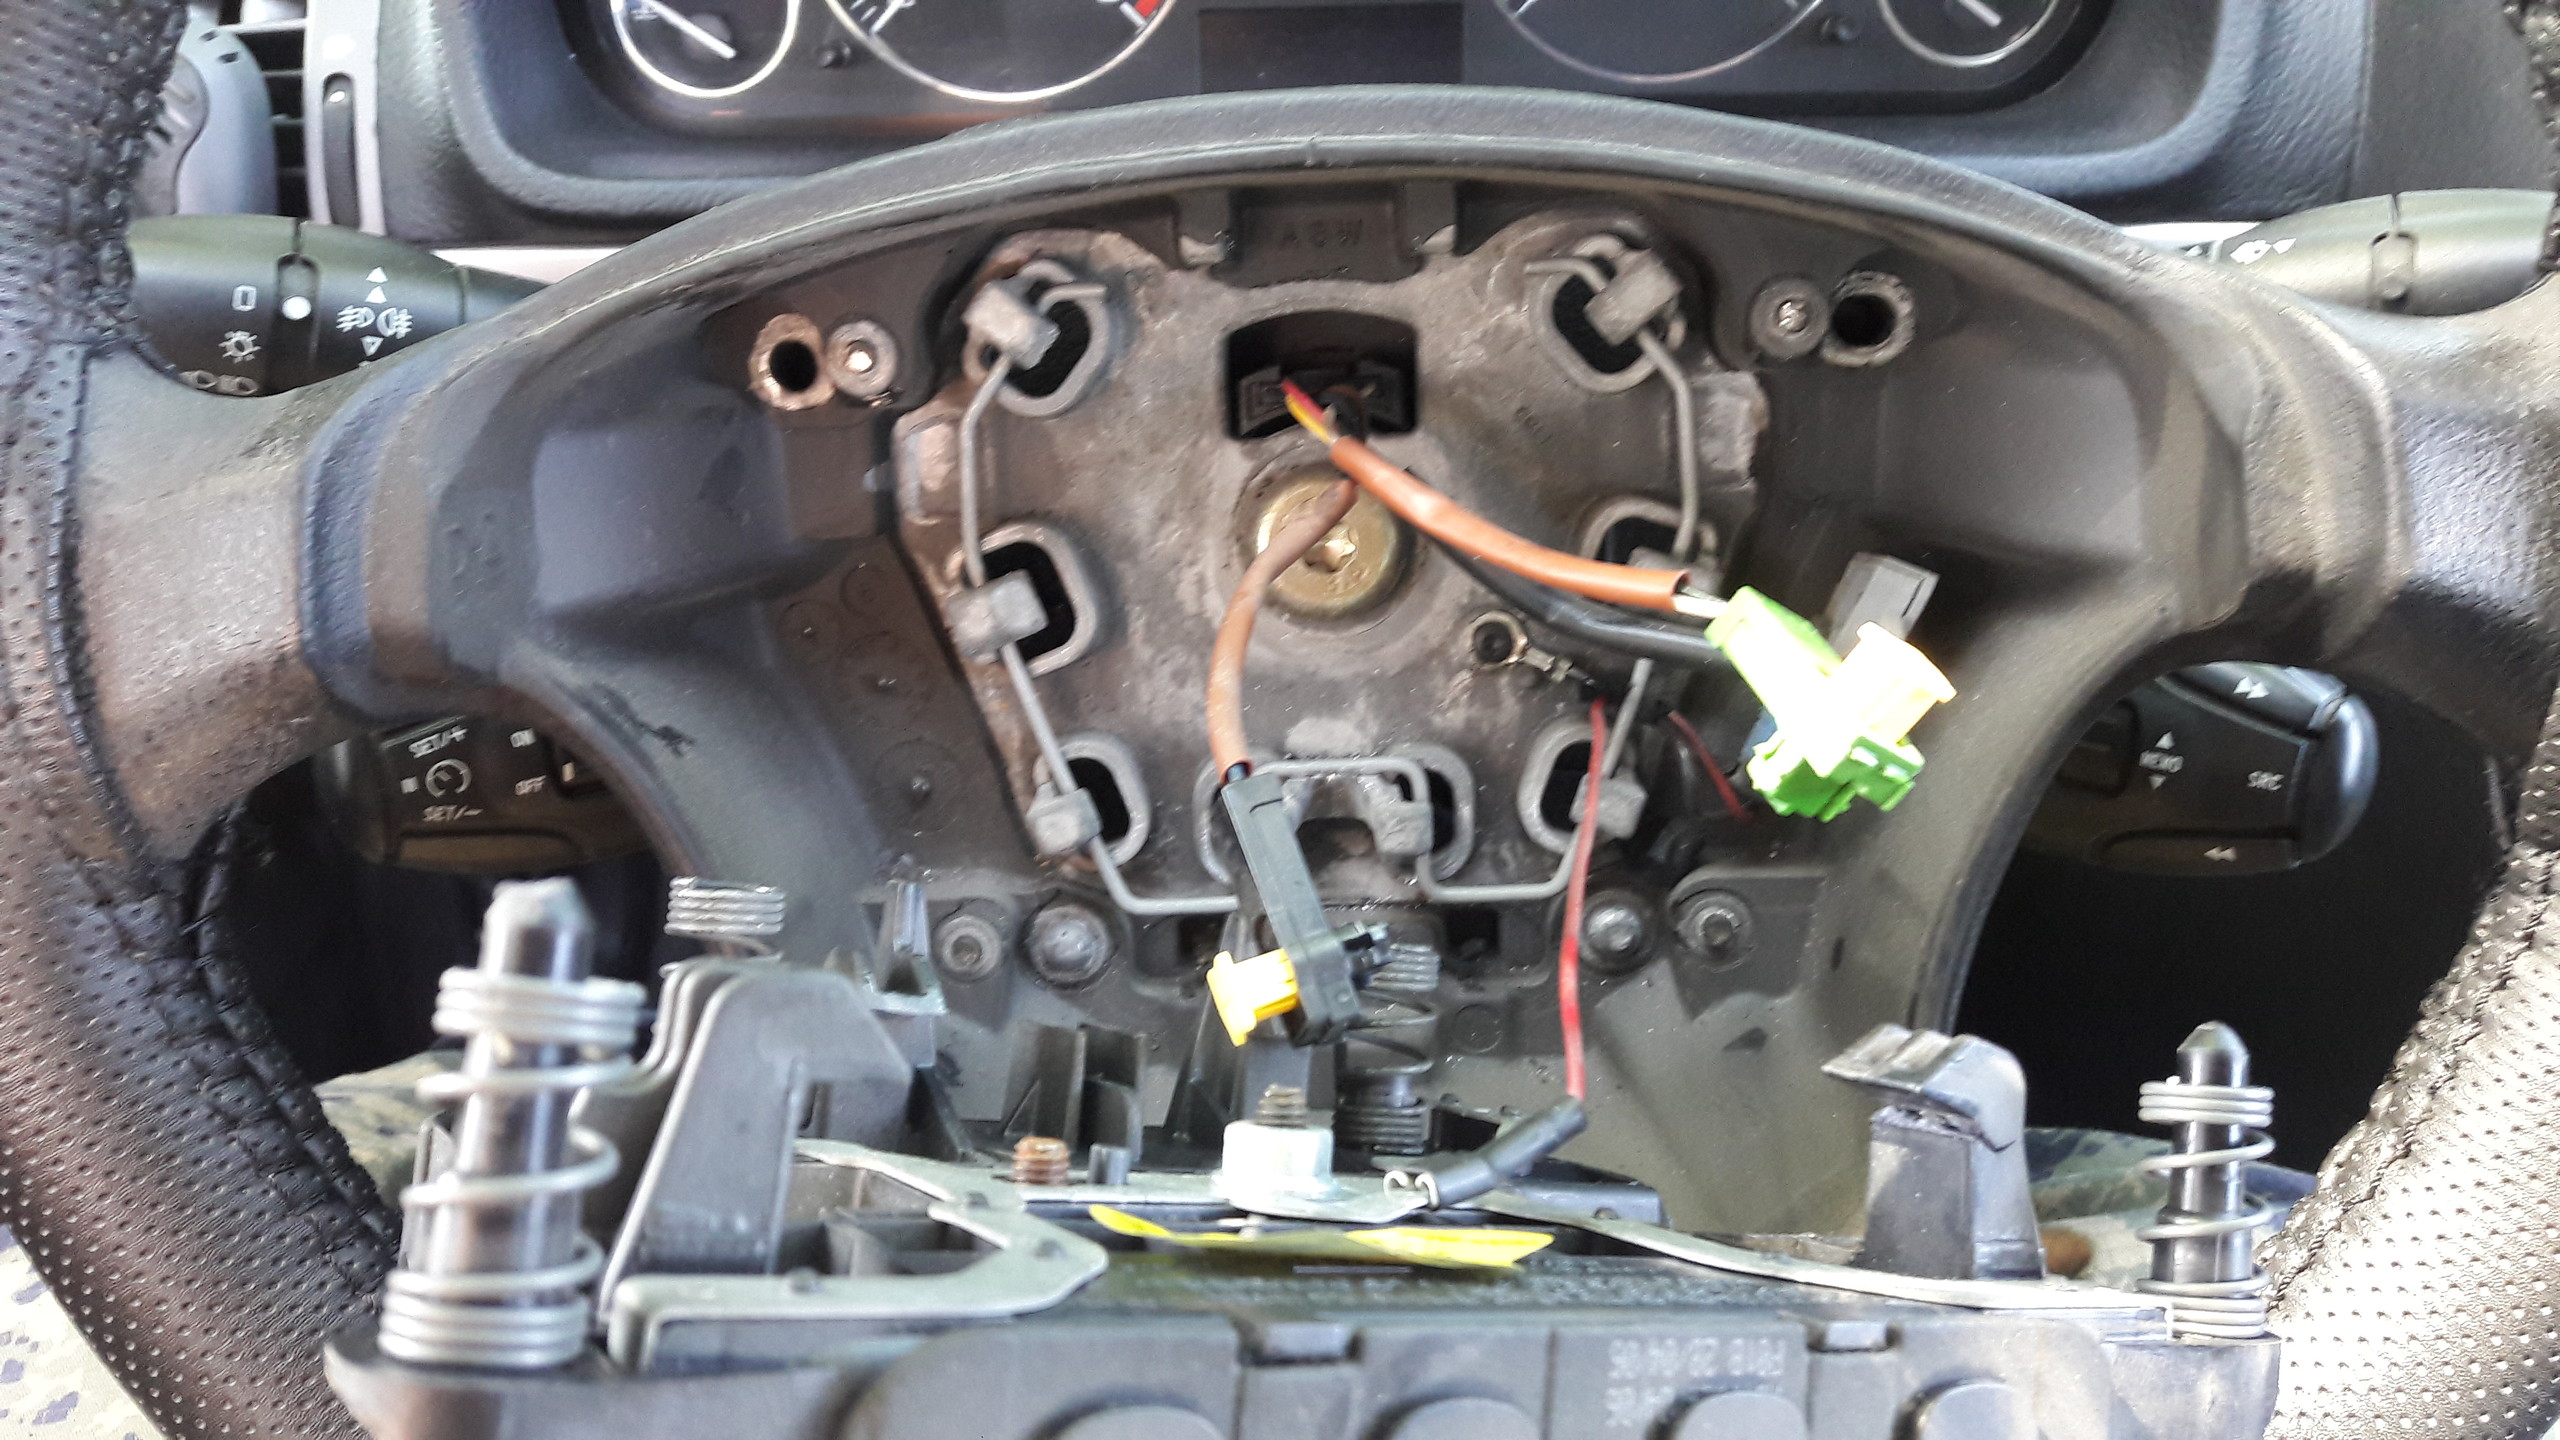 There are plastic covers below and above the steering wheel . To remove them, we need to unscrew the two points on the picture from the bottom. They are also six-leg star screws but I don't know the size, I did not pay attention. After the screws are removed, the top cover is removed by paying attention to the tabs on the sides. Then the bottom cover is removed by slightly stretching the contact side. 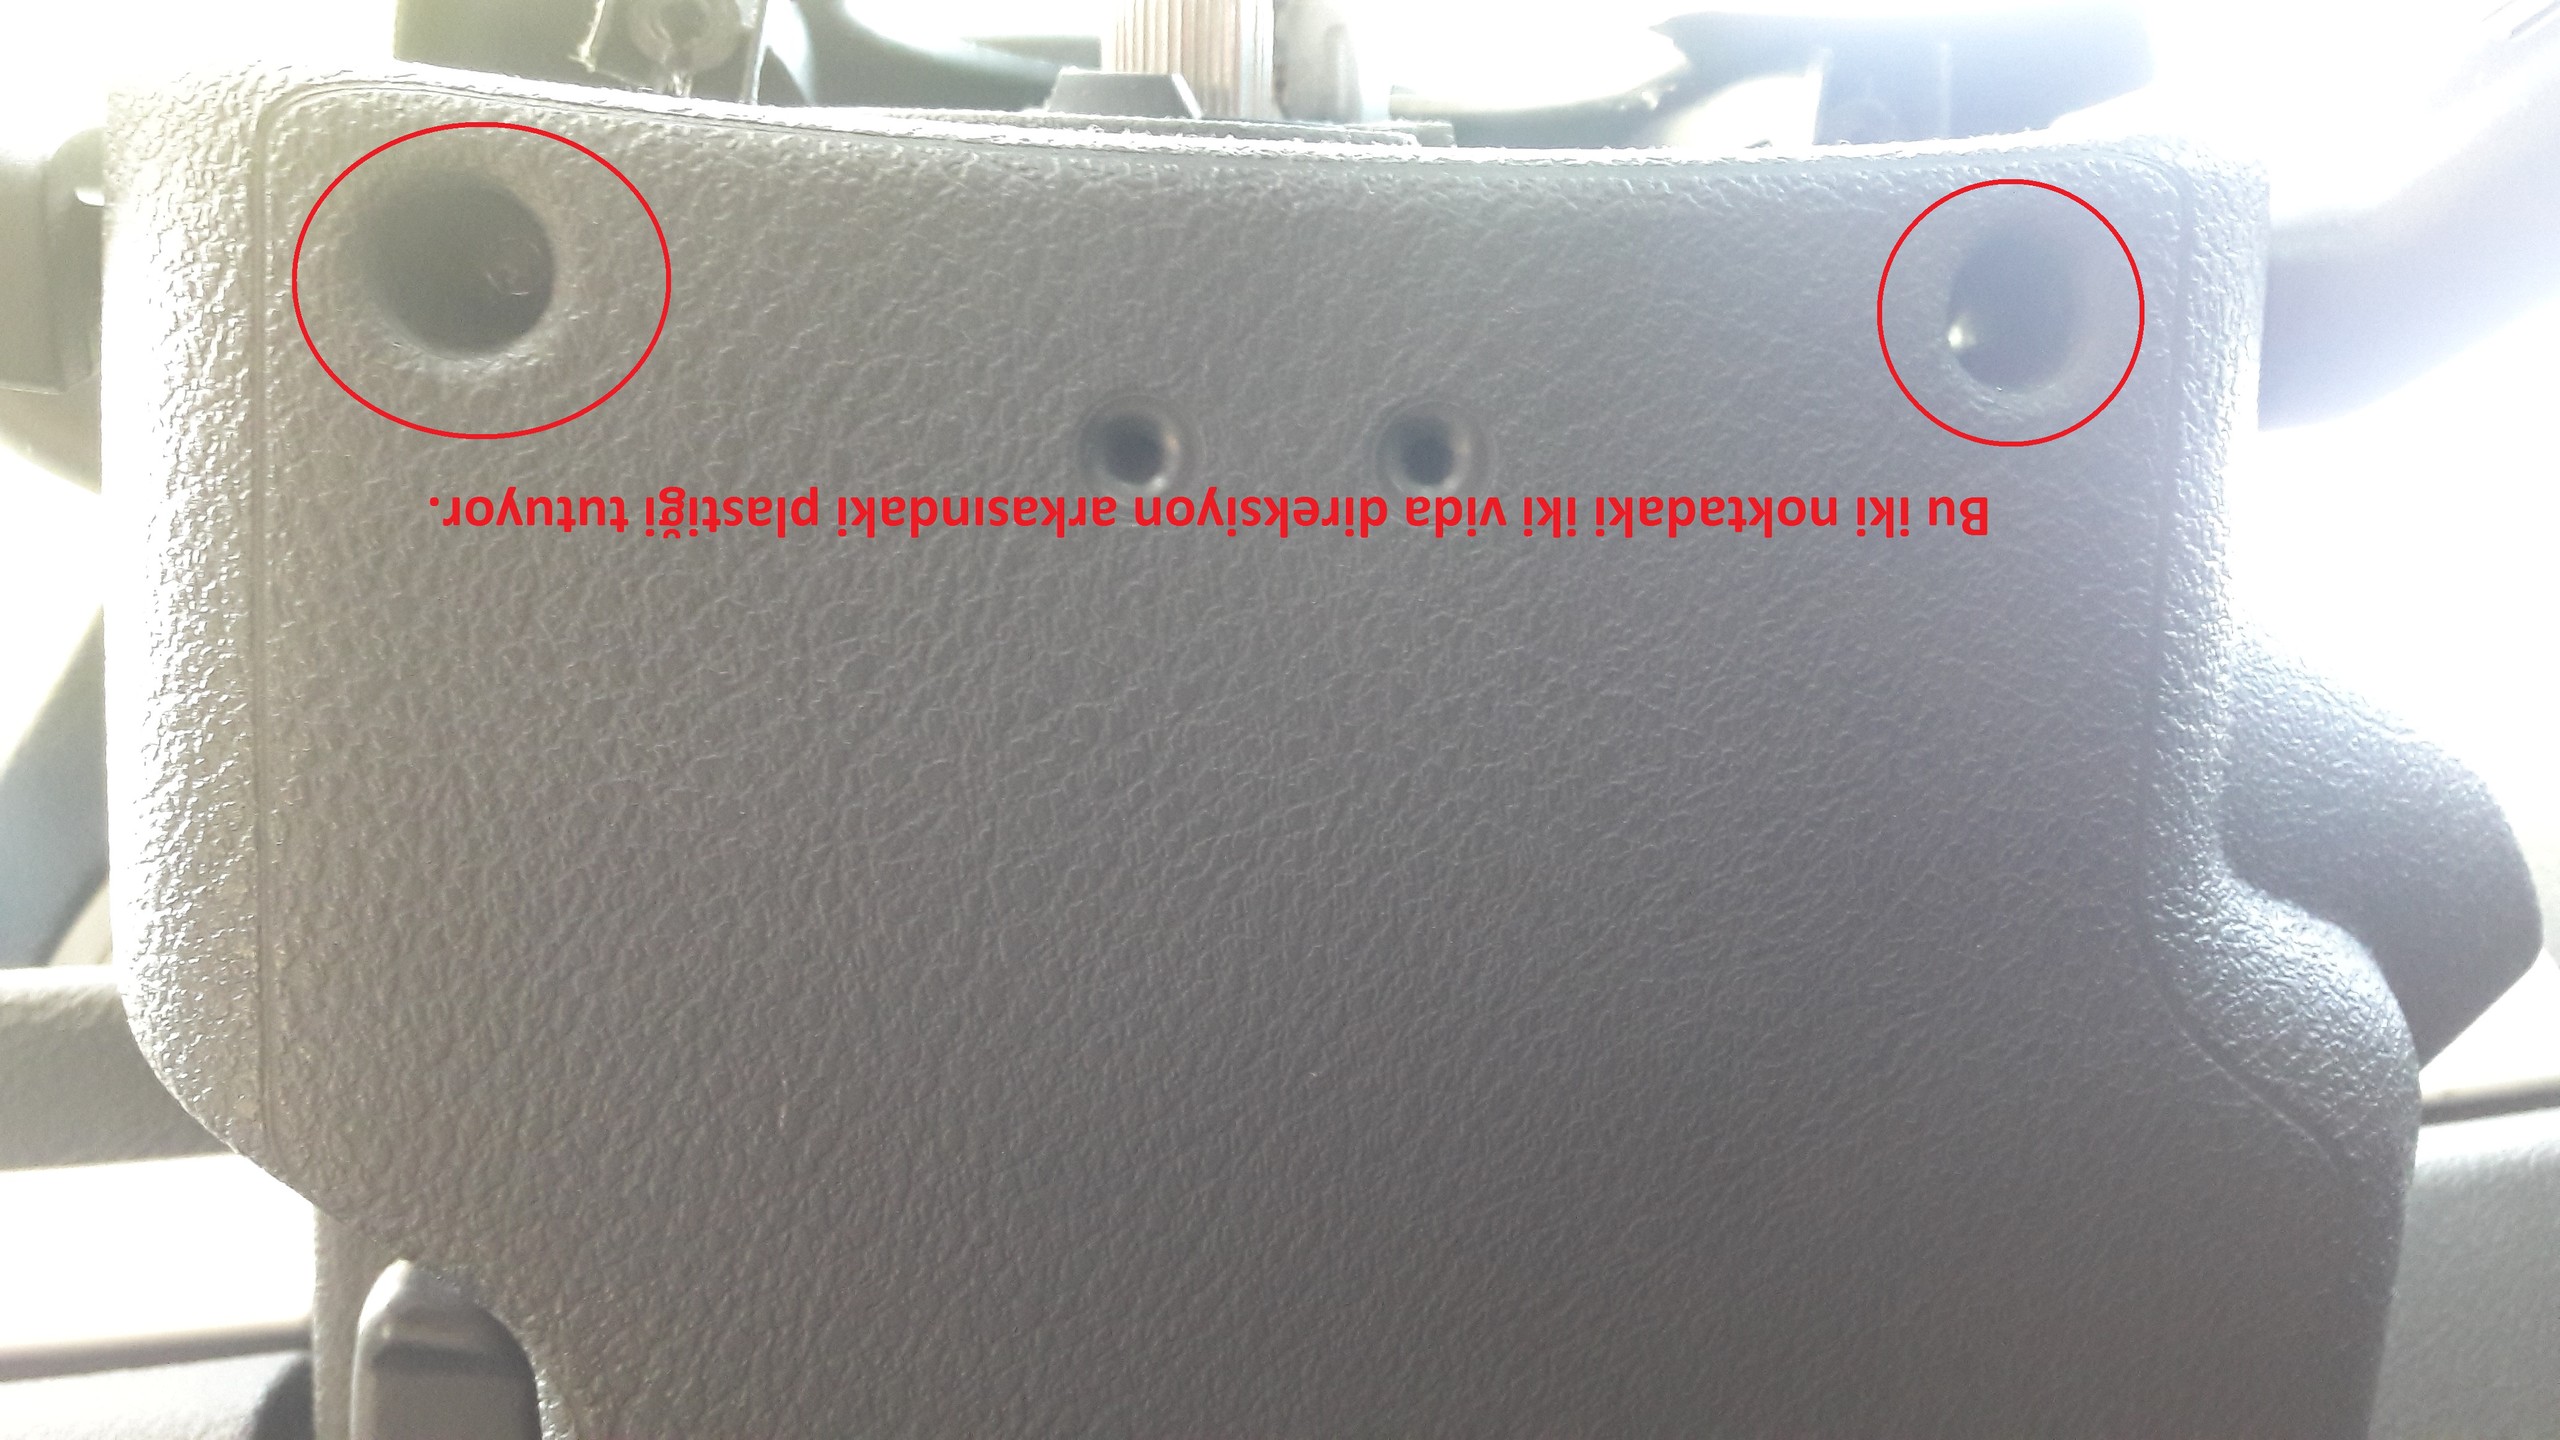   Now the only thing that holds our COMM2003 controller is this screw on its back. It is enough to loosen this screw that holds the control to the steering column housing. After loosening a little, it comes directly when the control is pulled ...  There are five sockets holding our controller. Since they are all different in colors and shapes, they are very unlikely to get involved when removing and installing them. Just a little attention ...   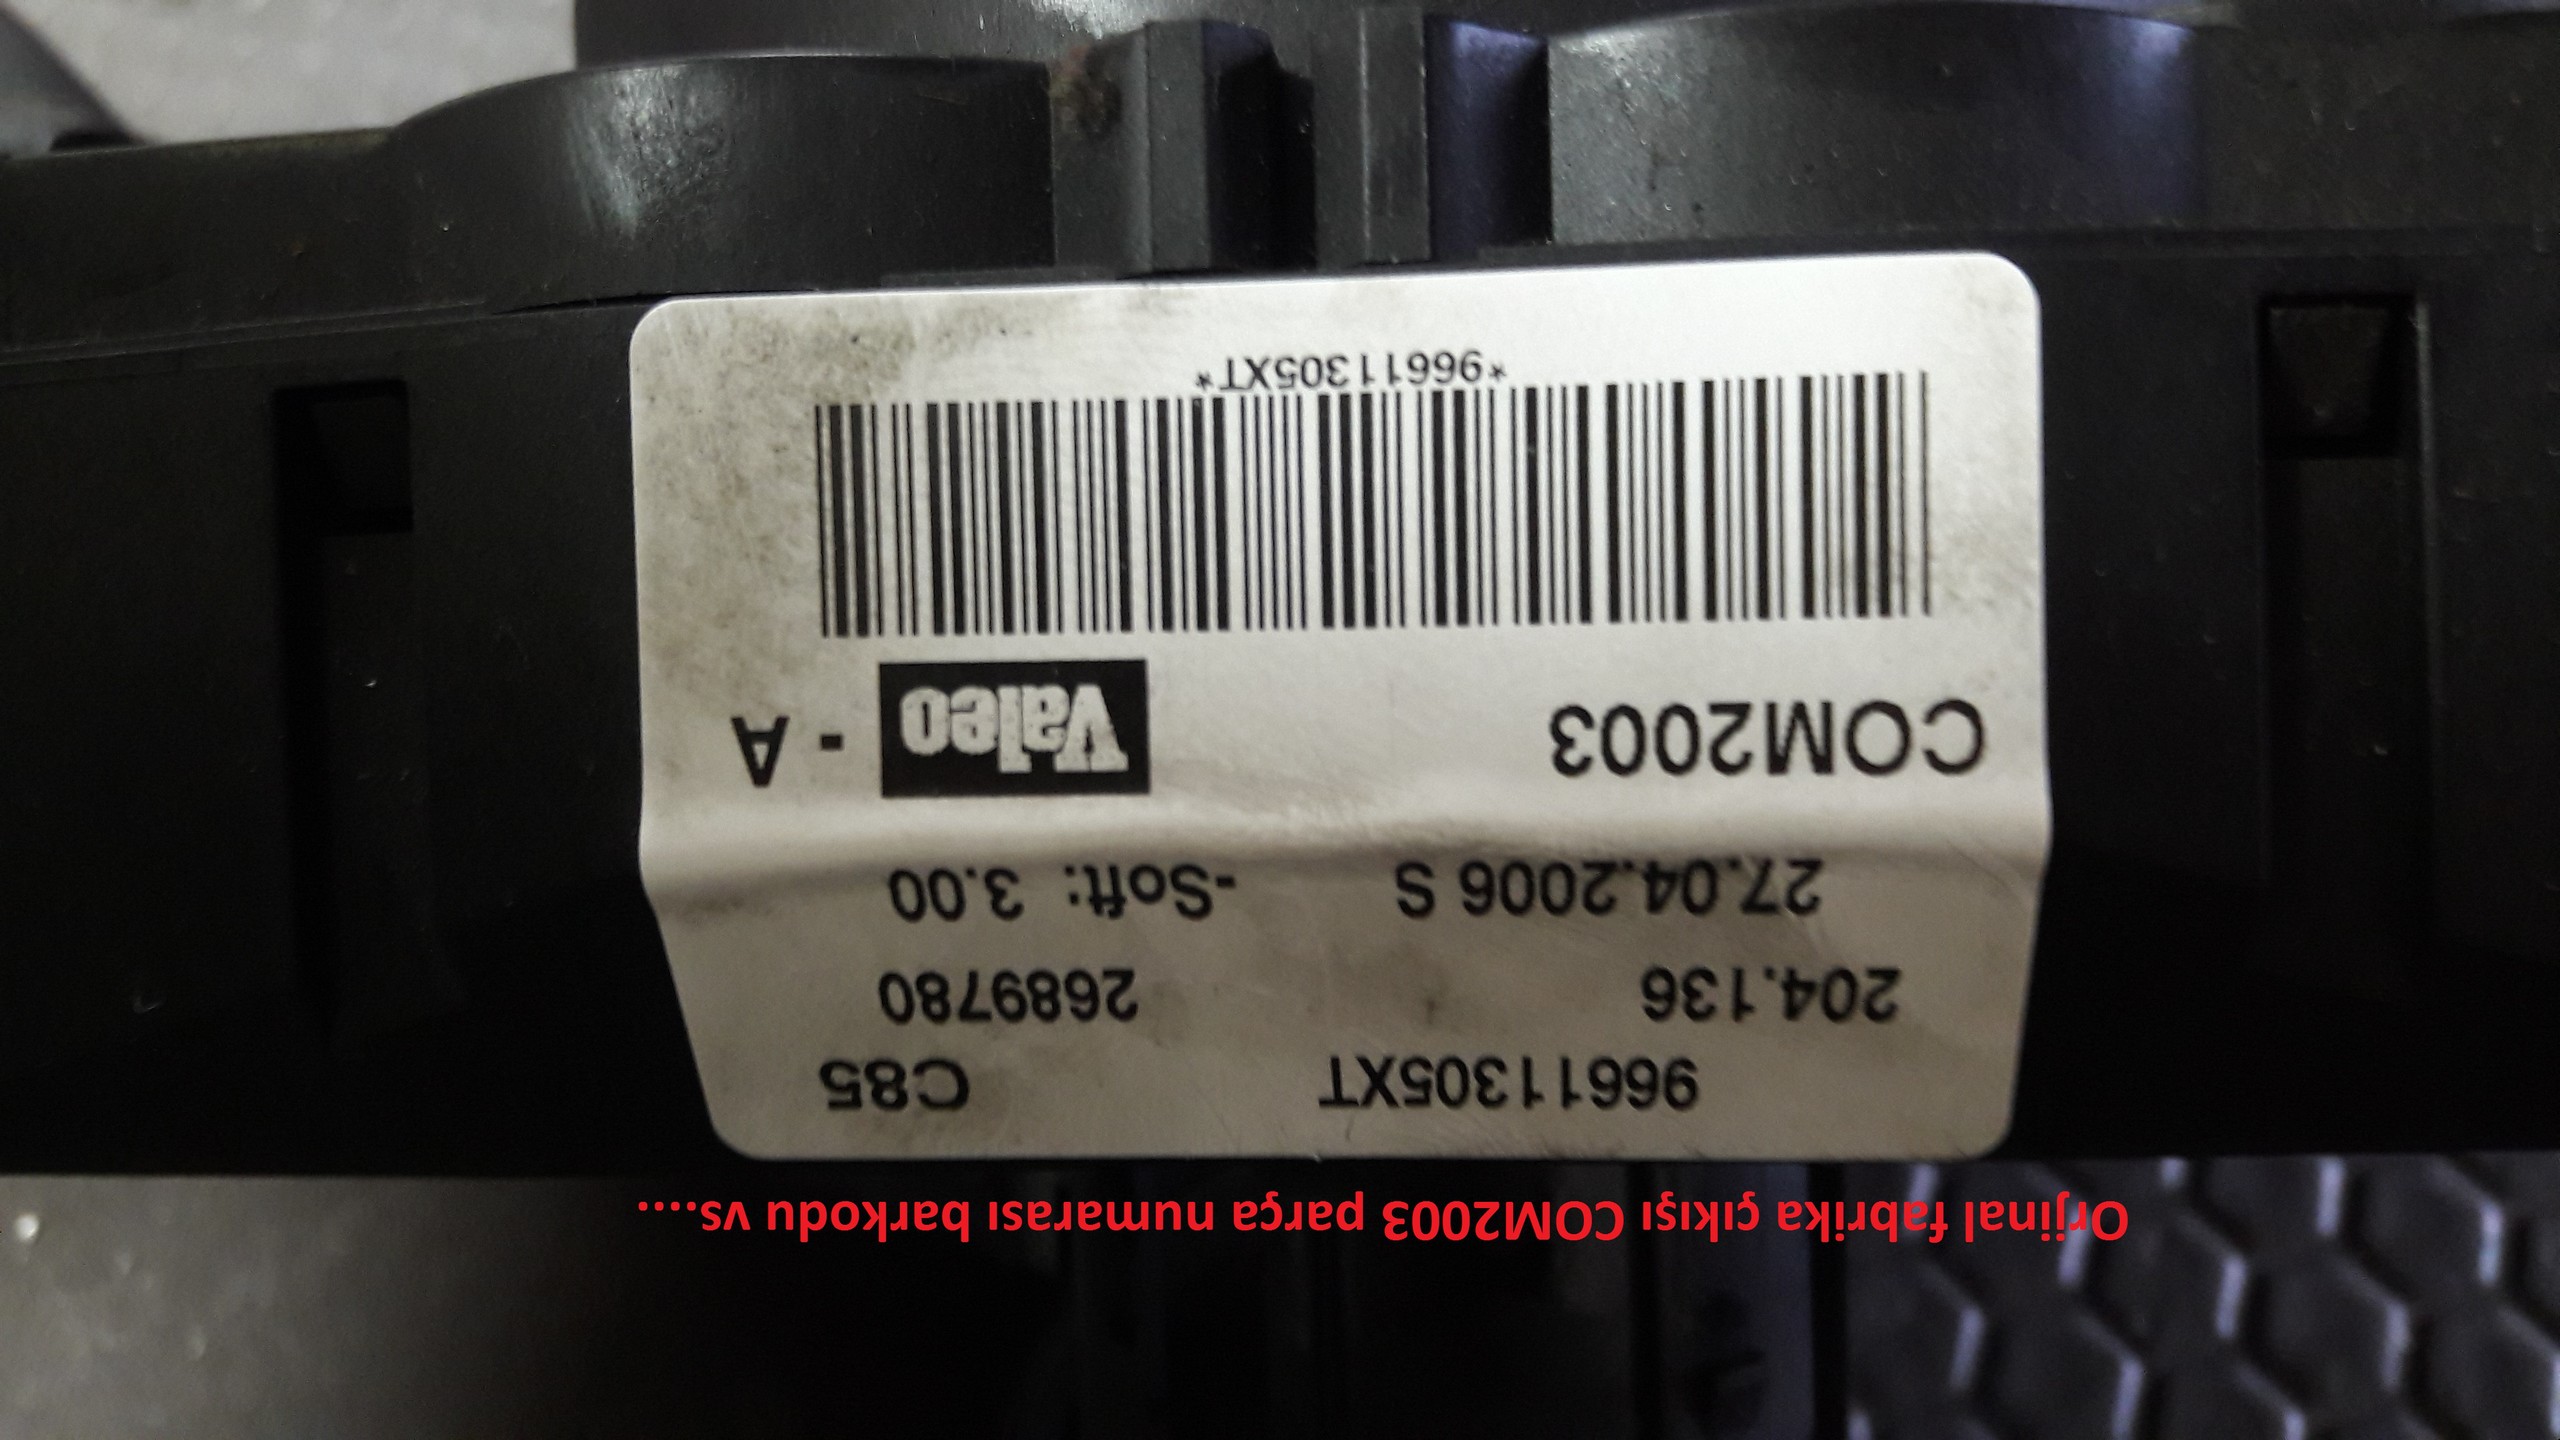 After removing our controller, we came to the signal lever ... There are two screws holding this. We just need to remove these two screws ...   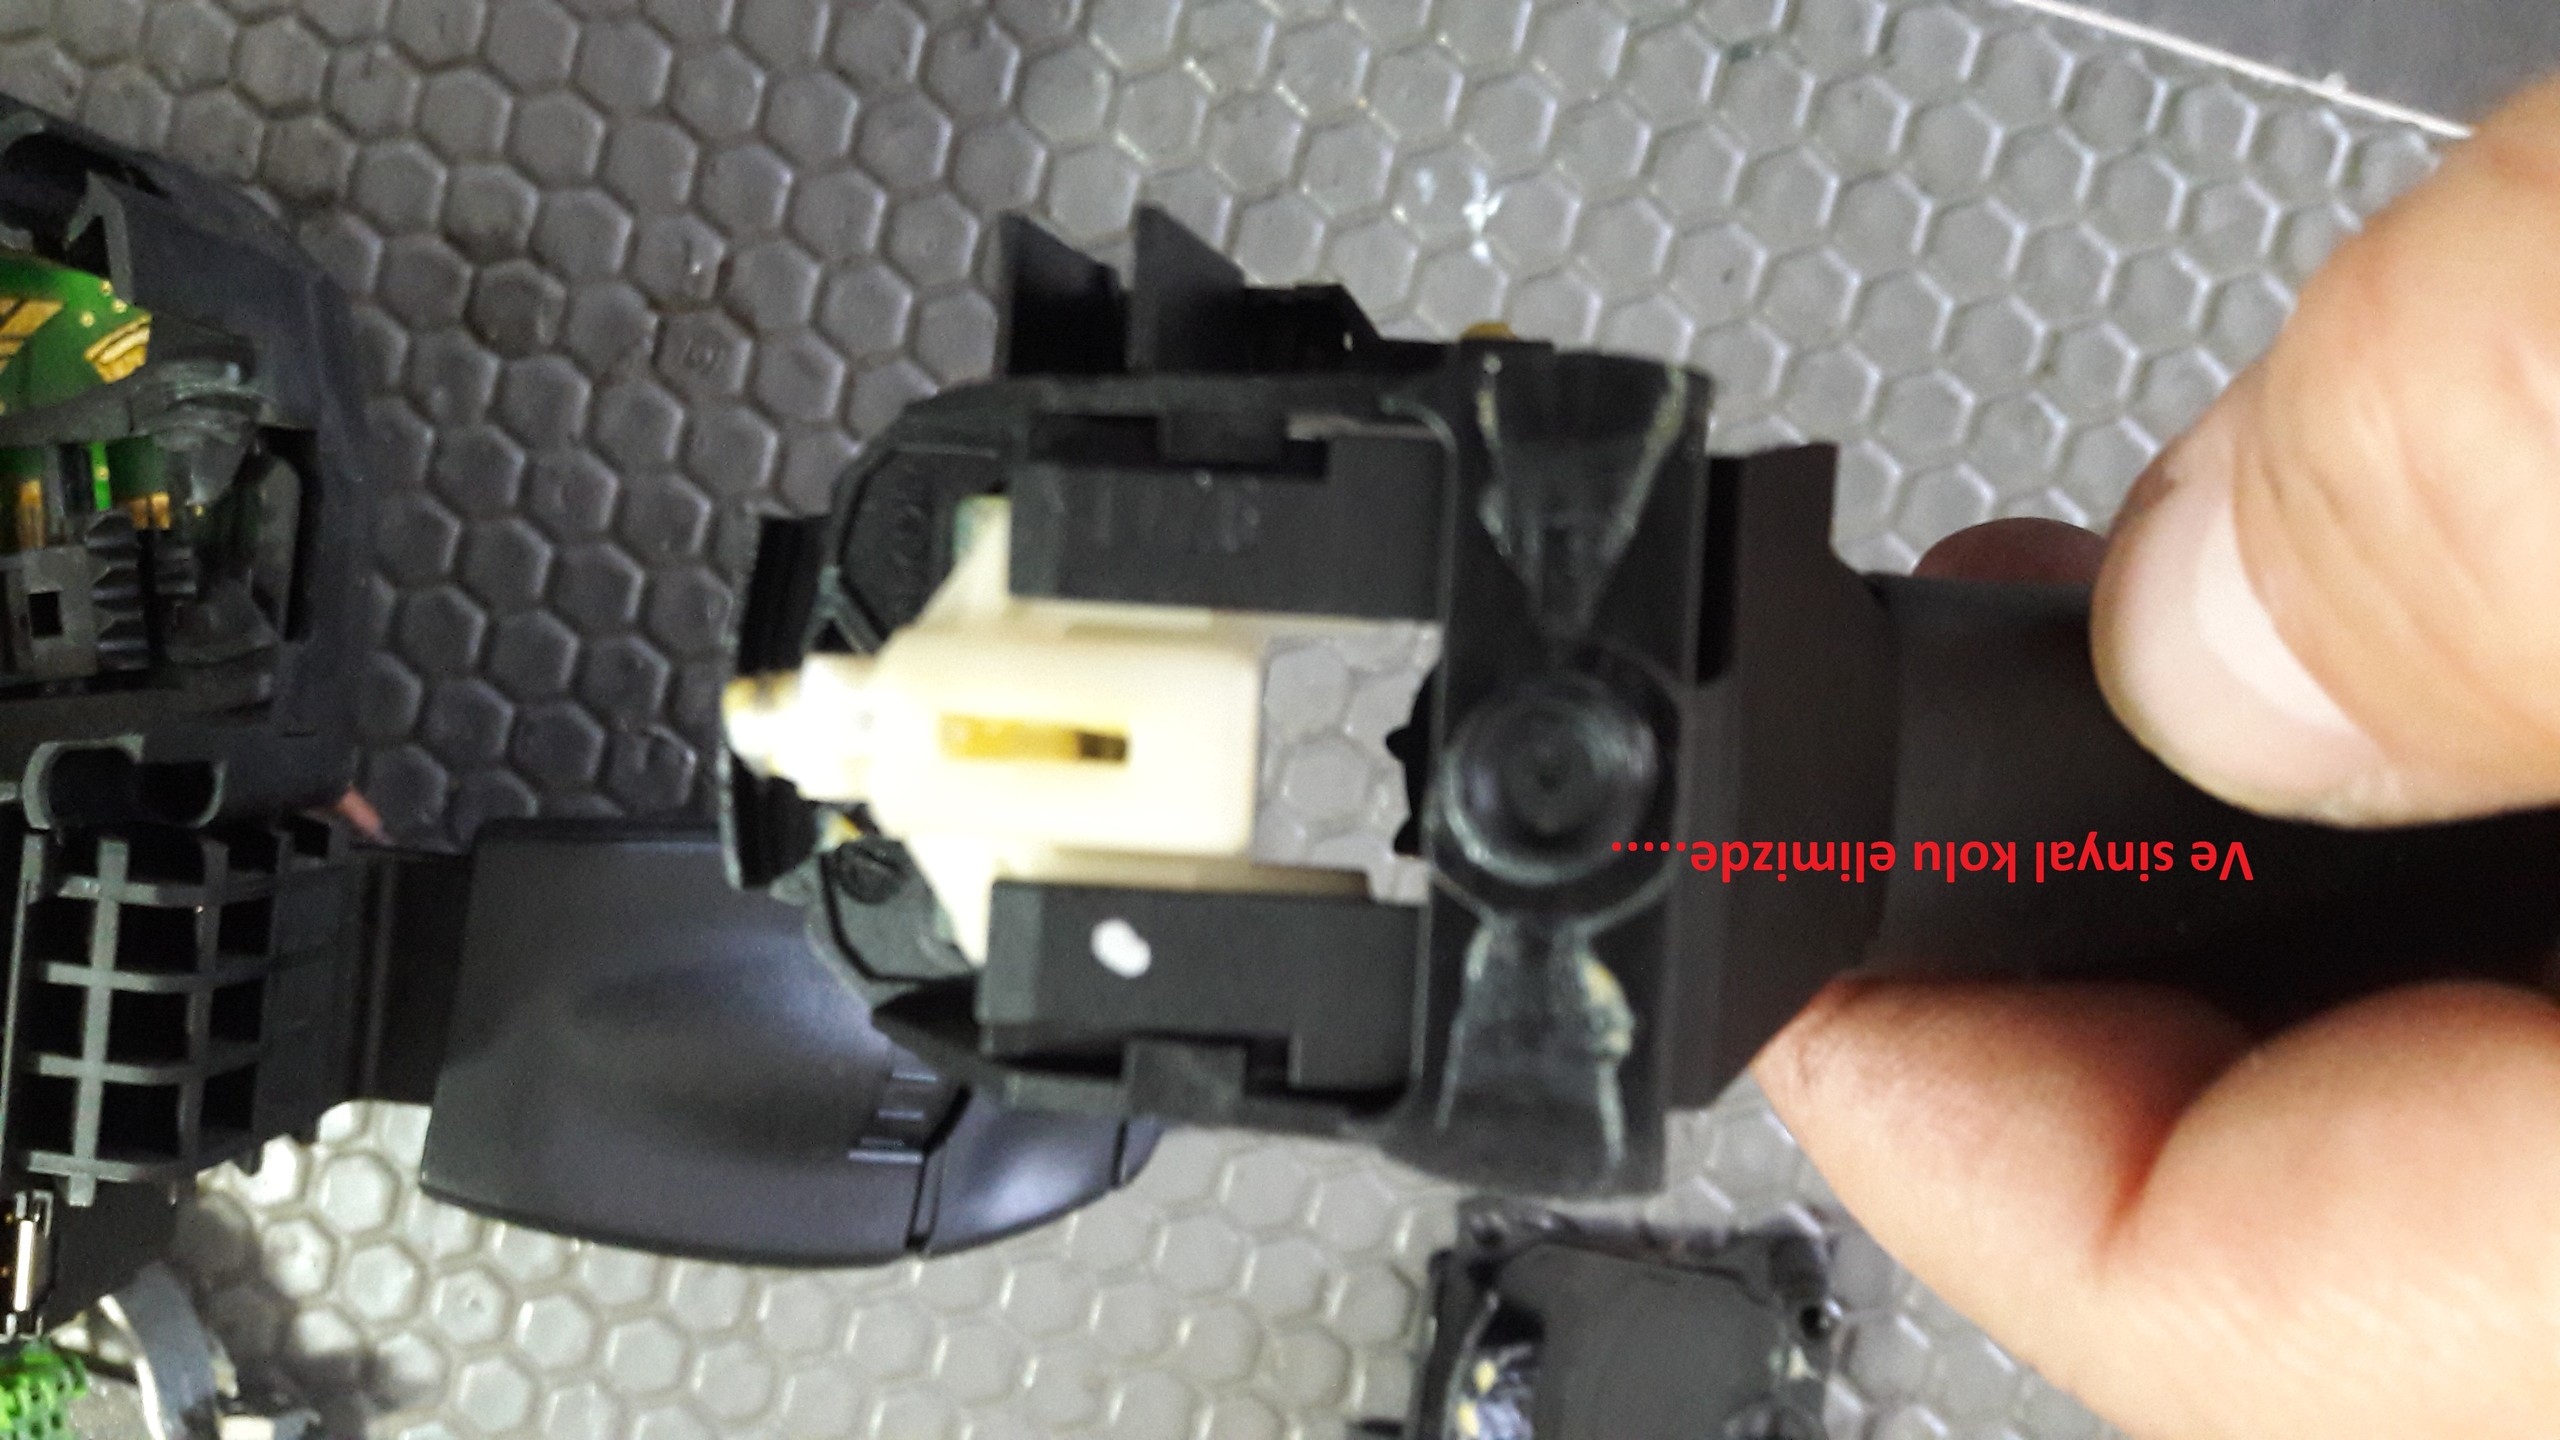 One of the signal arms in Aliexpres I mentioned earlier is film wired, one with 4 copper wired sockets and one with metal nails. When I removed my arm, I realized that it was not closely related to what I was talking about. It was a completely mechanical arm in me and looked just fine.  These gears, which are in the form of two three-legged combs side by side, operate the system by moving the sliding keys on COMM2003. The inside controls the fog, the outside controls the headlights. Just like these, COMM2003 has three-legged nails and these nails control the sliding switches. 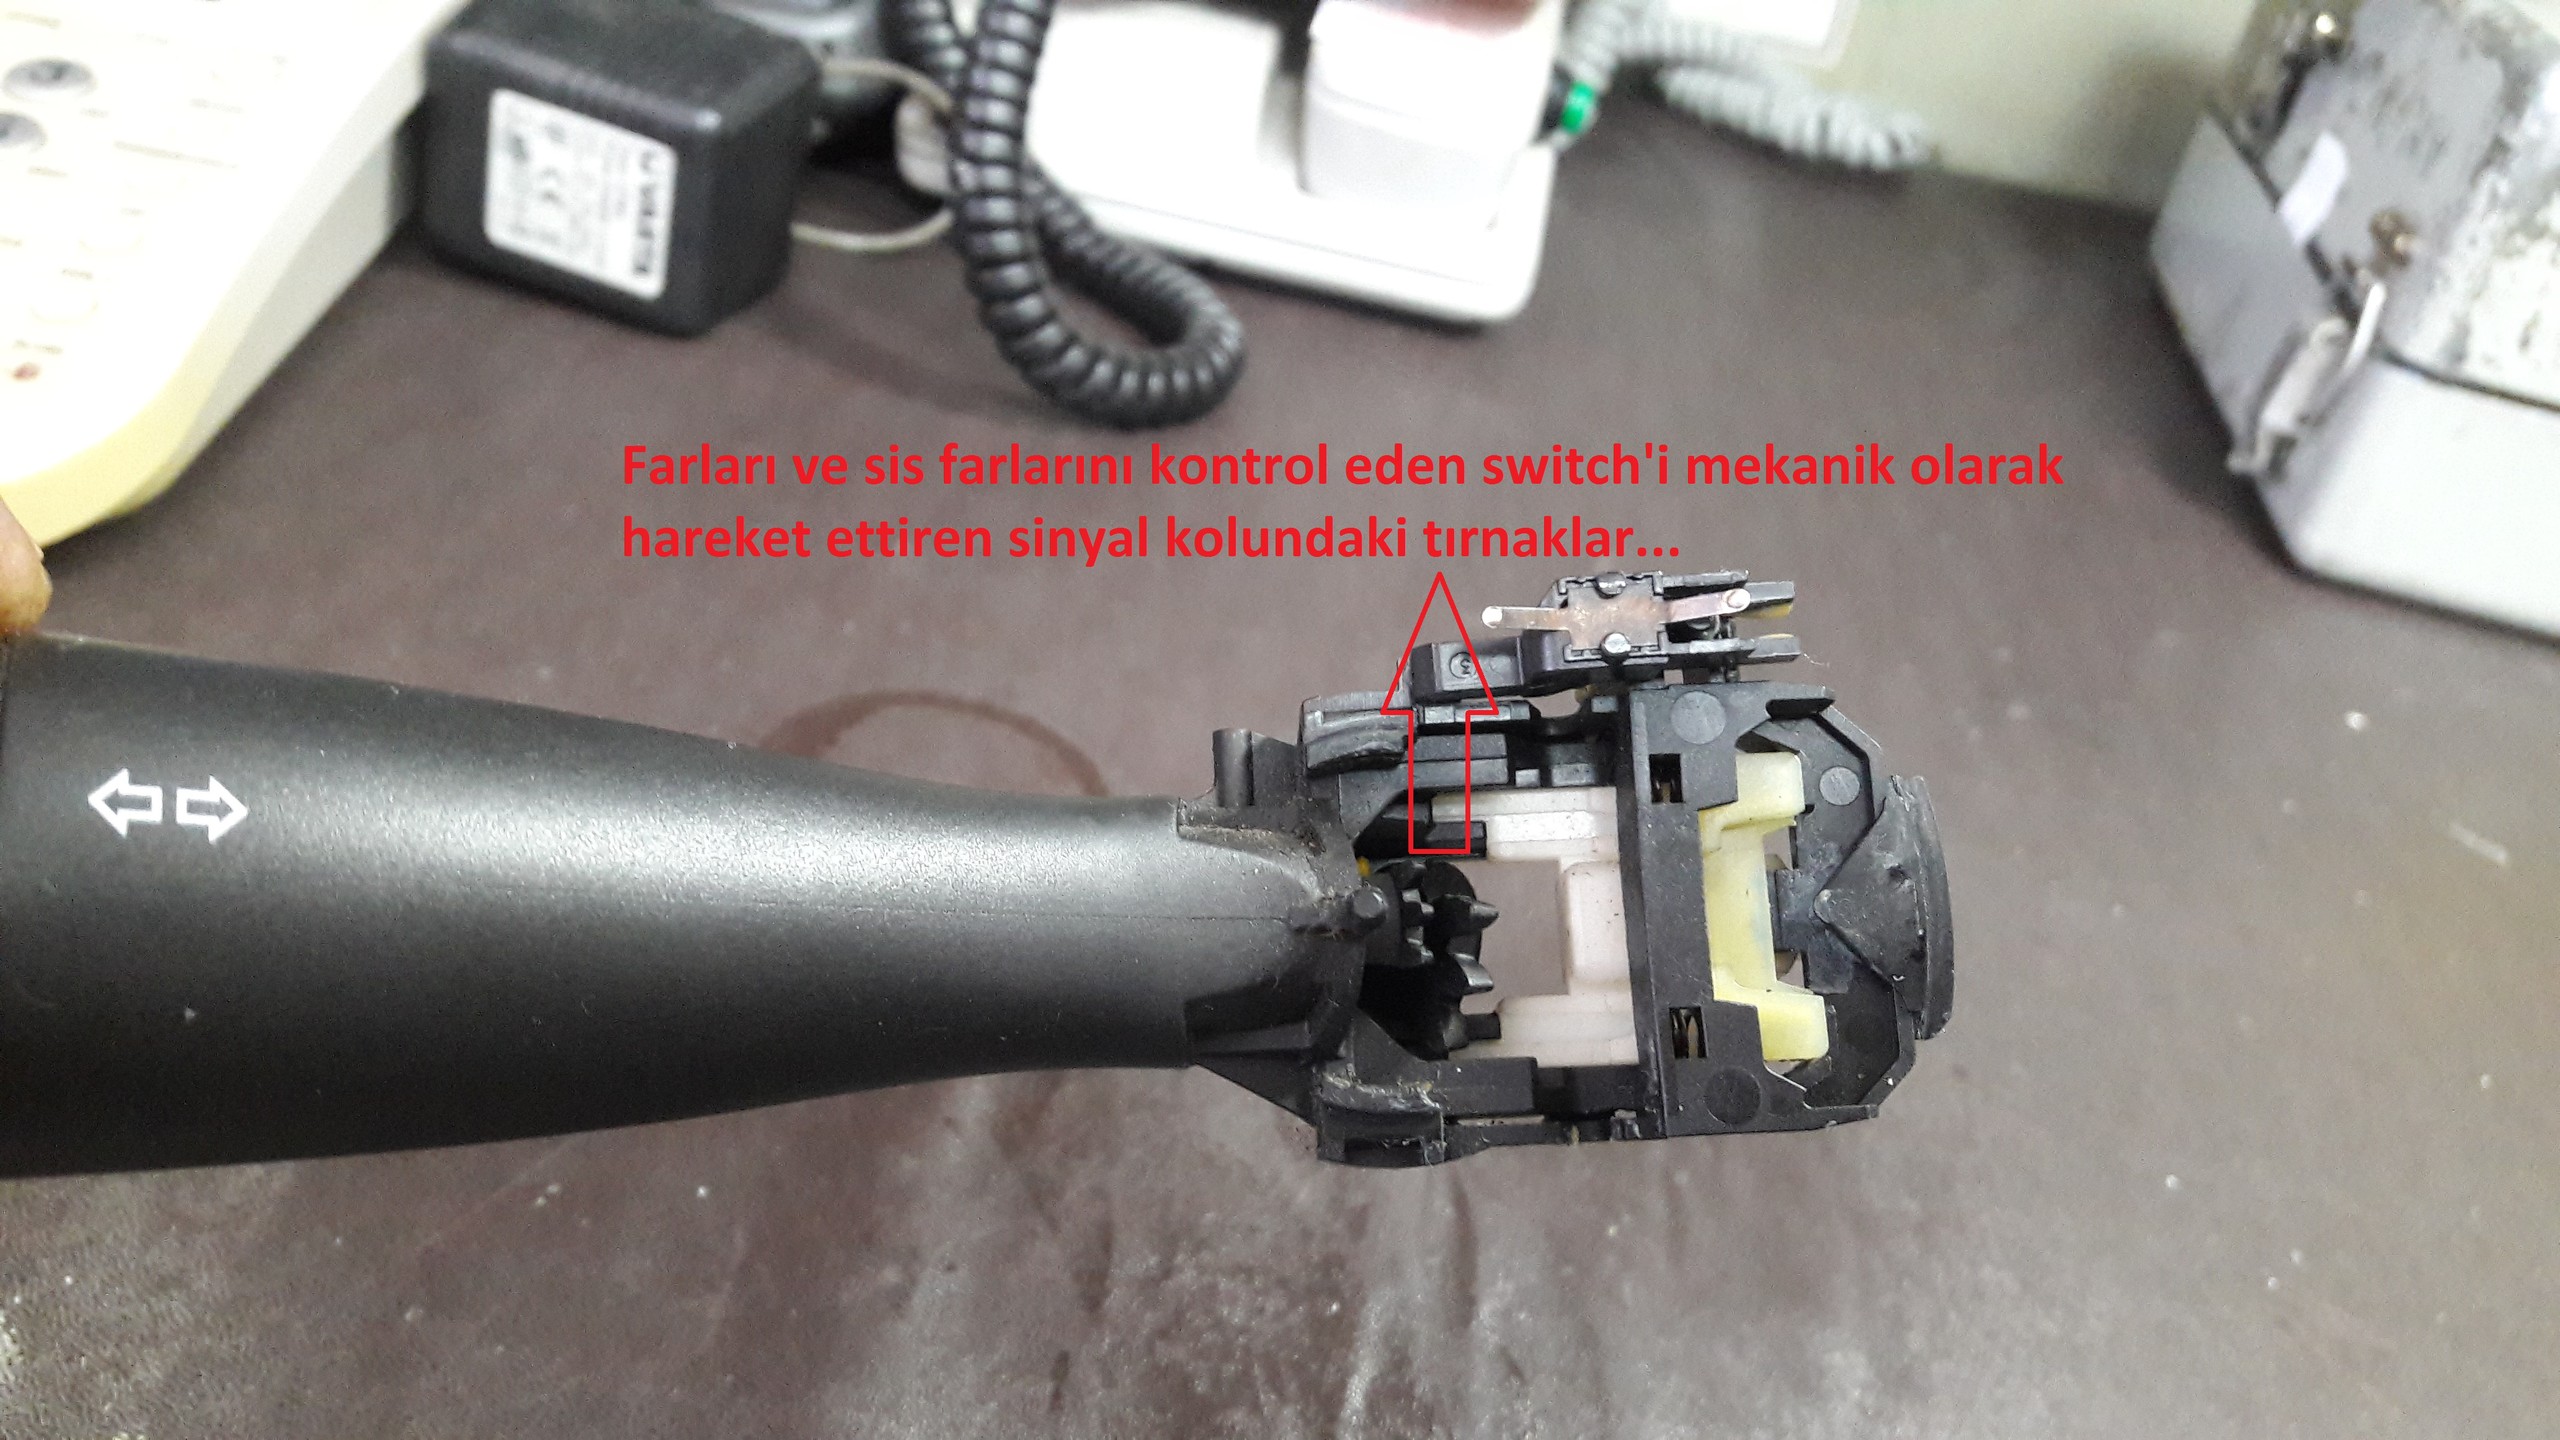 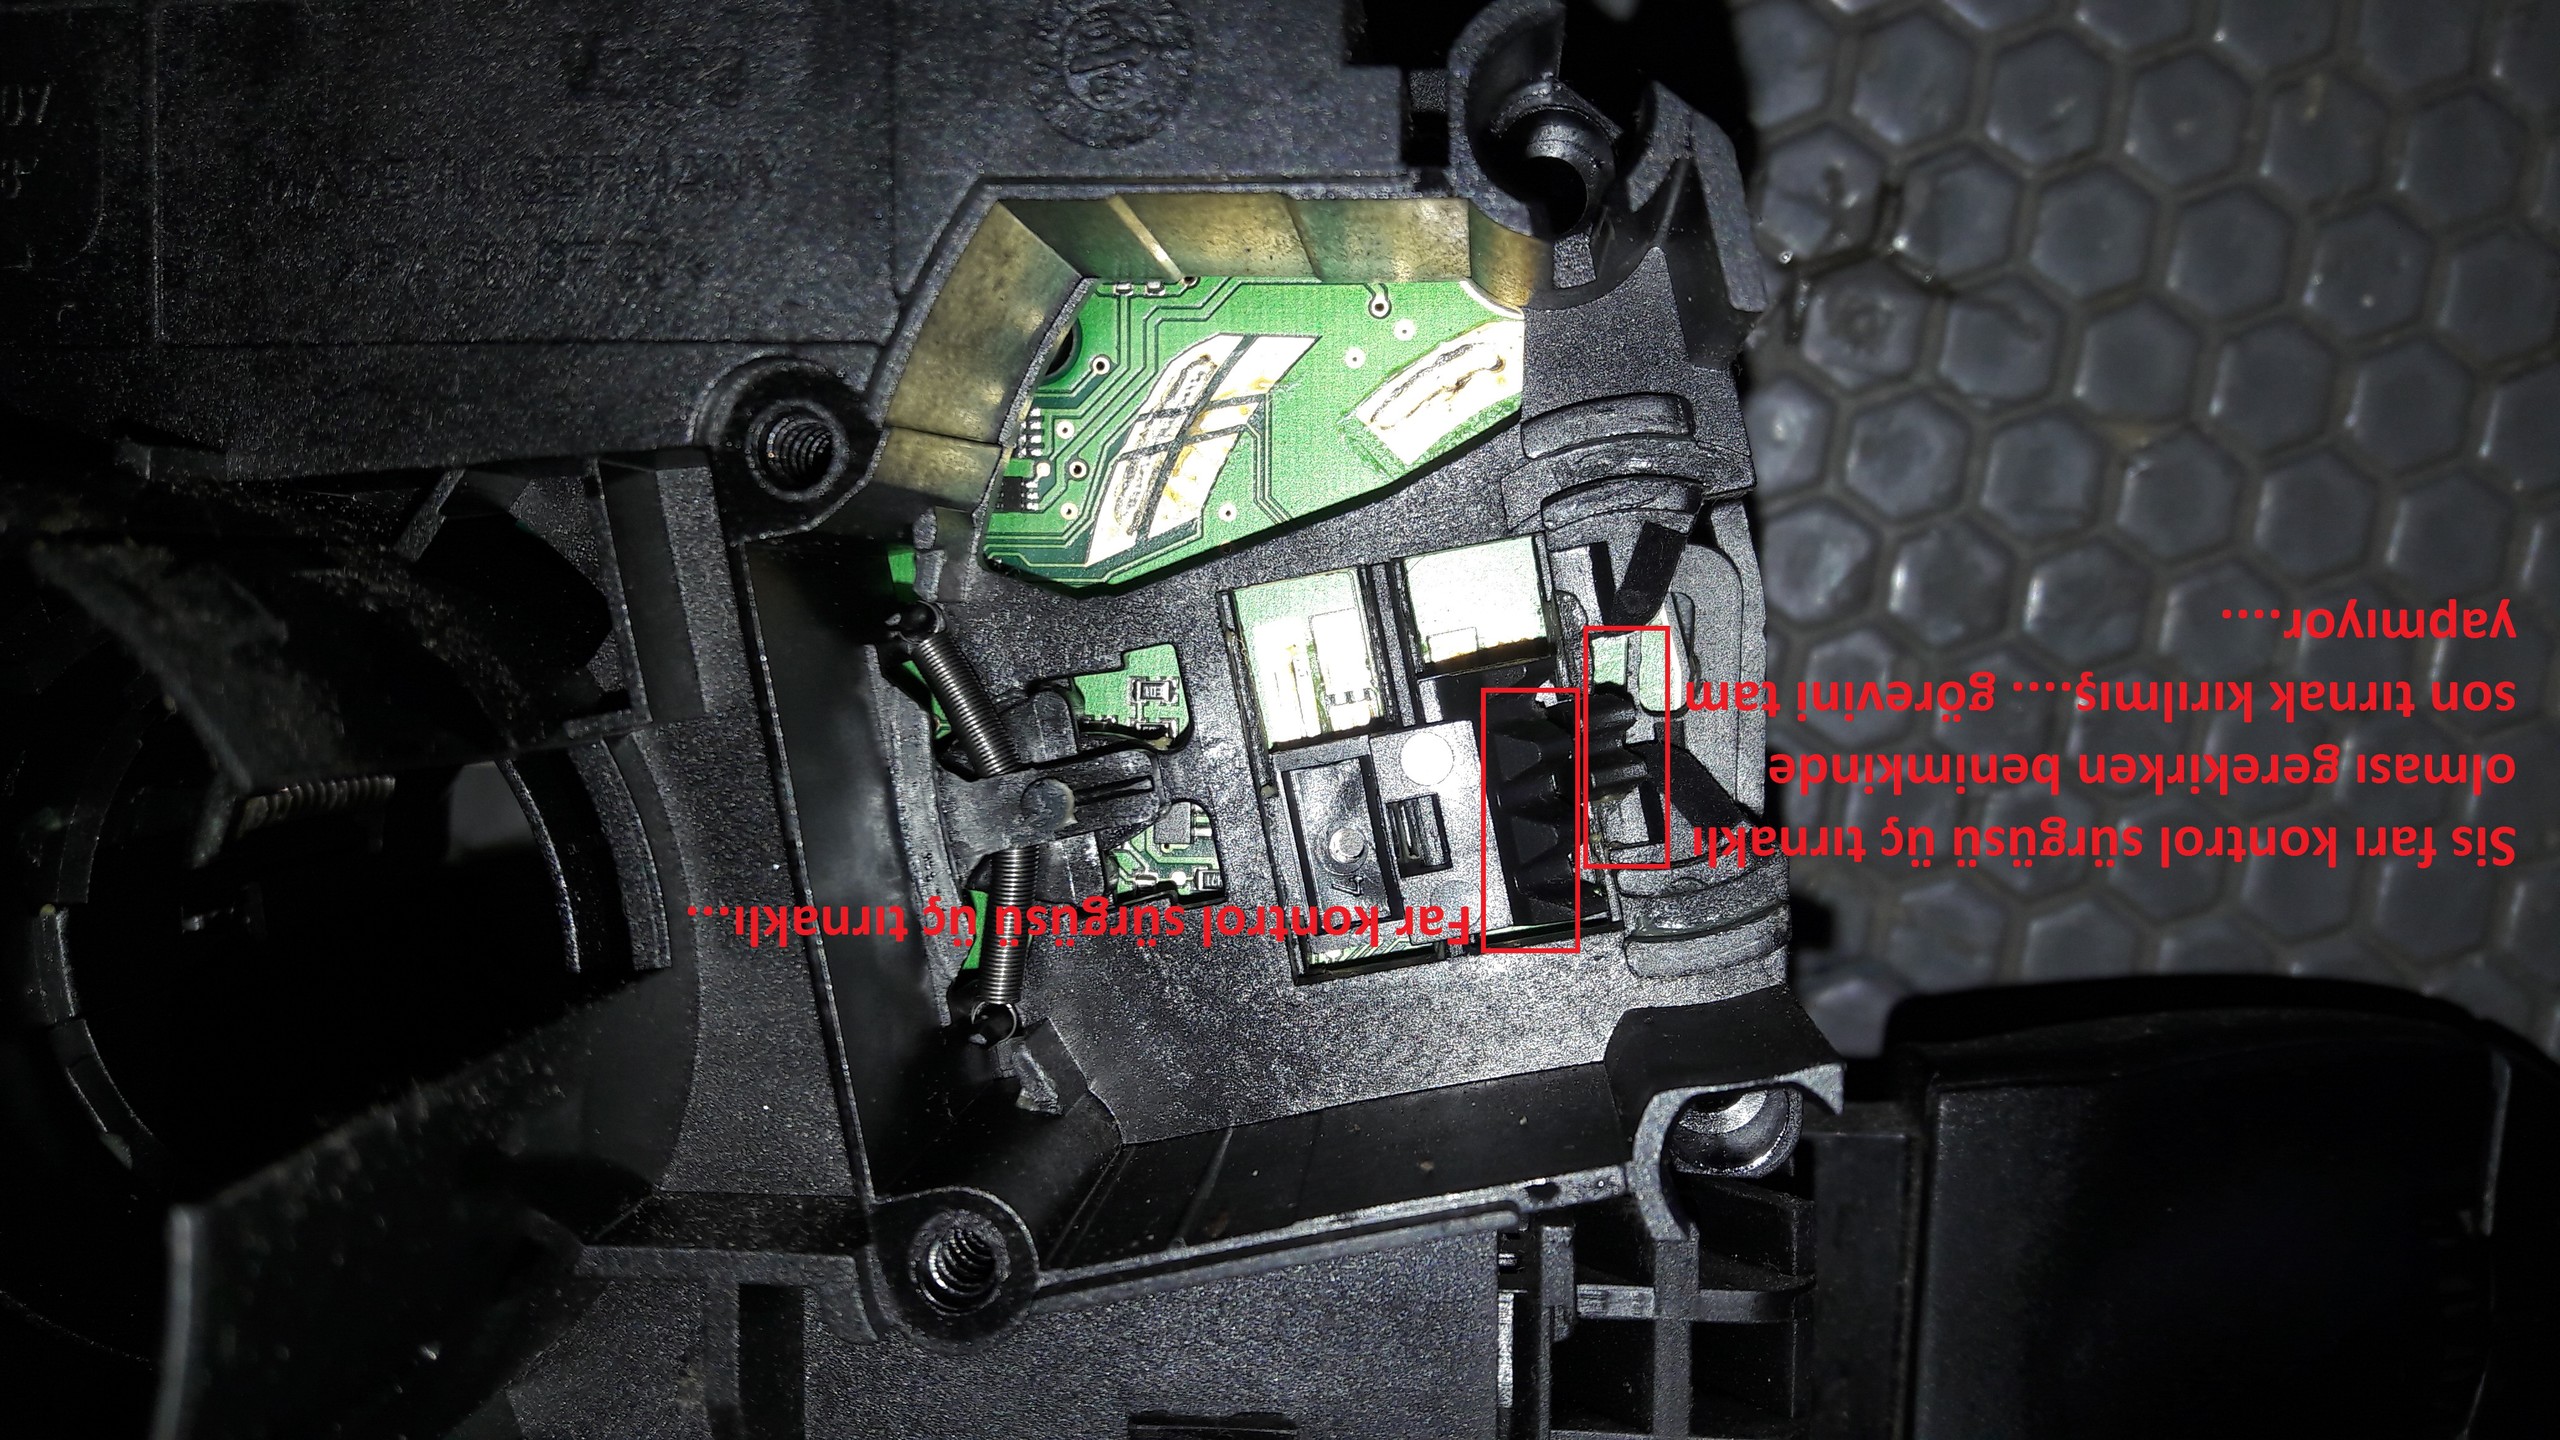 As seen in the picture, the last of the slide that controls the mists in my control two nails are left. Therefore, when you closed the mists, this key could not return to its normal position, it was stuck in the closing position, it could not be operated when you tried to open it. In order to prevent this slider from going up too much, I prepared a little bit of a paste paste adhesives called Sunfix and then assembled and assembled the system with the idea that it does not work anyway with the idea that it does not work. When I reconnected the cables going to the fog lights on the side of the fuse box inside the engine and tried the system, I saw that the malfunction disappeared and the fog lights could be controlled via the remote. I deleted all the fault records and turned off the car and turned it on. Everything was normal. When I started the car, that warning sound and text disappeared. Frankly, I like my own workmanship: D So I wanted to share this information with you, with the pleasure of having remedied another defect of my vehicle. I hope it will be helpful for someone who needs it ... We will also contribute to your questions ... If there is a point that I cannot fully explain about the subject, I will try to answer your questions with pleasure ... I wish everyone a good day without accident ... I am publishing in this way because I do not know how to fix the reverse load, do not look at my fault :)) |
|
| 08.05.2020 20:52 | # 2 |
| necmettinn |
|
|
When I was reviewing the subject, I wanted to warn that it caught my attention. DO NOT REMOVE the round mechanism with the Airbag and other cables after the control is wasted ..... In the videos I watched, he was talking about the fact that he had a sensor. Allah can lead to unwanted failures.
|
|
| 08.05.2020 20:52 | # 3 |
 talip206 talip206 |
|
|
Sir, you are super, good health, very revealing. My attempt to disassemble was up to the airbagin socket. I gathered the socket back in time 
|
|
| 08.05.2020 20:52 | # 4 |
| necmettinn |
|
|
[QUOTE = talip206] Sir, you are super, health in your hands, very revealing. & Nbsp; My attempt to disassemble was up to the airbagin socket. I gathered the socket back as soon as possible Thank you, thank you .... doing as much as I can I'm working 😊
|
|
| 08.05.2020 20:52 | # 5 |
|
Thanks for sharing your health ..
|
|
| 08.05.2020 20:52 | # 6 |
| necmettinn |
|
|
[QUOTE = ersin61] Thanks for sharing your health .. [/ QUOTE] 👍
|
|

